Instructions to Build a Sifter for Fossil Hunting
Some of the best places to find fossils are creeks and ditches, but along with fossils, you also get a lot of other stuff like rocks, sand, mud, twigs, leaves, and water. The water is the key. If its only a few inches deep, you can just walk along and find teeth. But we all know that those spots are rare, so we are left with the places that are too deep to walk but to shallow to dive. Here, we sift. Every serious toother either has a sifter or has used one in the past. I recently cleaned out my garage and found that my old one needed to be decommisioned. She performed admirably, but they time has come to construct a new one. I thought it would be a perfect candidate for my site. So here goes - step by step instructions on how I build a sifter.
Keep in mind that I'm not claiming to know everything or that this is the best design for a sifter. But I have been doing this for a long time, and this design is both durable and easy on the back to use because it floats. Not only that, but its really lightweight. I used to have a wooden sifter, but I ended up trashing it because when the wood gets wet, it makes the sifter really heavy. Finally, this sifter is really strong. The cross wires on the bottom support the weight of the gravel, thus extending the life of your mesh. Its a win-win design.
Step 1: Get the parts
To build this sifter, you need:
- Wire Storage drawer - Lowes on the shelving aisle
- 1/4" galvanized mesh - Lowes in the fencing area (usually outside)
- 4" cable ties - Lowes in the electrical department
- 17" cable ties (or longer if you can find them) - Lowes in the electrical department
- a swimming pool noodle - Wal-Mart in the pool toys section
- a length of rope or stap (how much depends on how tall you are) - Lowes in the rope and chain area
- knife
- tin snips or wire cutters
Step 2: Prepare the mesh
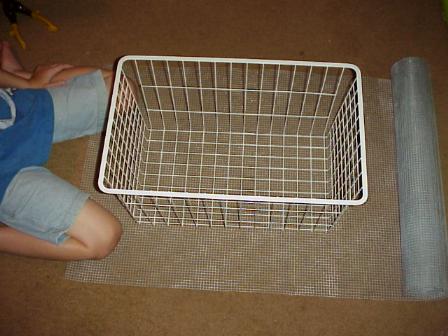
The deal here is you have to measure out how much of the mesh you need. It usually comes on a roll and one roll will have enough to make several sifters. Roll some out and set your basket on top of it. You want to make sure that you have some overlap on all four sides of the sifter. This overlap will keep the fossils from falling through the side of your sifter, so don't be stingy! Cut it from the roll and put the rest of the roll away for future use. Its great to have a helper for this part.
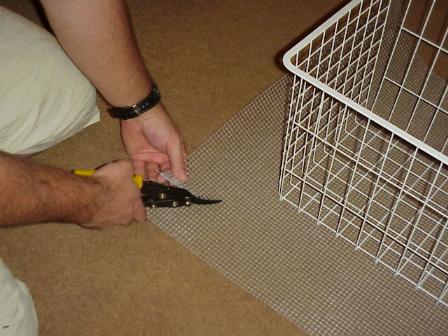
Next, sit the basket in the center of the piece of mesh you just cut. With your wire cutters/tin snips, cut from the corners of the mesh in to the corner of the sifter.
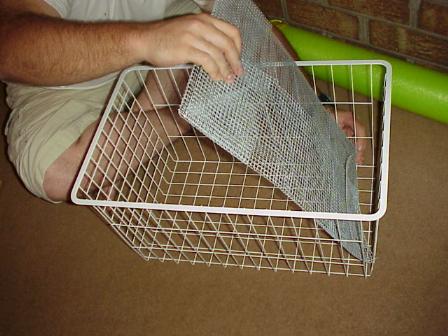
Now fold the edges toward the center of the mesh. You'll have to fold the protruding triangles of mesh inward, too.

When you're done, you'll have a piece of mesh that you can drop into the bottom of the basket.
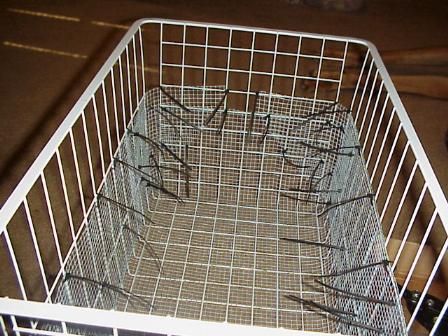
Step 3: Attach the mesh to the basket
Unfold the mesh at the bottom of the basket. Be careful! The edges of that mesh are sharp! The reason we left the corners on where we cut it is because they provide additional stability for the basket at the corners where it is the weakest. If you examine the corners, the sides are unattached! Its a pretty cruddy design for a basket, but hey, it was made for socks.
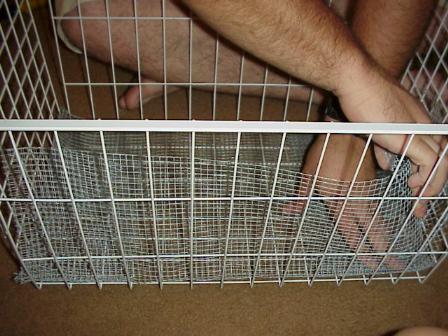
Ok. Back to the sifter. Once you have all the edges unfolded, begin attaching the mesh to the basket with the 4" cable ties. Don't be stingy with the cable ties - be sure to reinforce the basket at the corners, at the top, and the sides of the mesh. I ended up using about 30 of them.
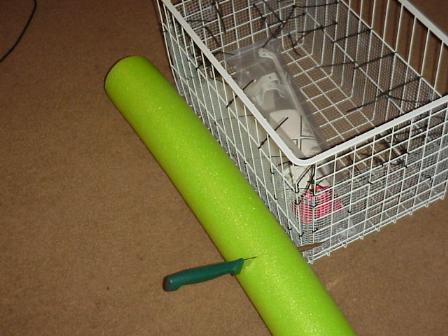
Step 4: Prepare the noodle
Lay the noodle along the side of the basket and cut it to match the edges of the basket. You may have to use more than one noodle if you bought a really big basket. Just recently, they came out with a new noodle called a Monsternoodle. Its 4" in diameter, unlike the original noodle that's about 2" in diameter. The advantage? It holds 300 pounds! That's a tubby dude in the pool or about the weight of a full load of gravel!
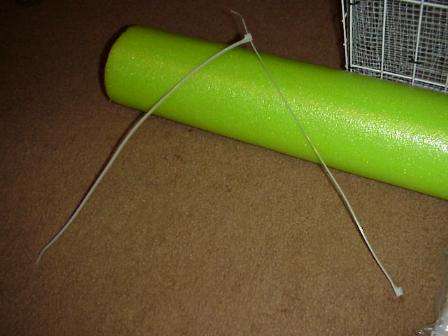
Depending on your noodle AND the size of the larger cable ties you bought, this step may be optional. I got a monster noodle and 17" ties, so the ties weren't big enough to attach the noodle segments to the basket. No big deal - You can attach two cable ties together.
Step 5: Attach the noodle segments to the basket
Attach the noodle segments to the top half of the basket above the mesh but under the bottom lip of the basket. Use plenty of cable ties and make them tight! You'll regret it if you don't because the noodles will fall off out in the field. Which brings me to a side point. If you make a sifter like this, bring extra cable ties with you on sifting trips. You never know when you'll need to perform sifter CPR in the field!
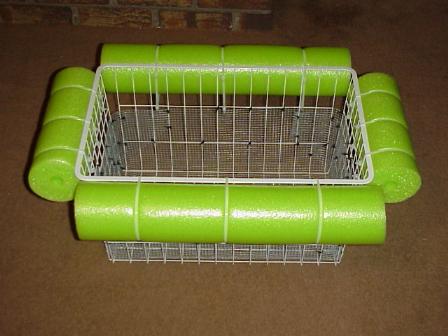
OPTIONAL: If you bought a monster noodle, there is a hole in the middle of it. Some rope through the holes attaching all the segments to each other really adds a lot of strength to your sifter.
Step 6: Attach handles
Attach the rope or strap you bought to the corners of the sifter. DONE!